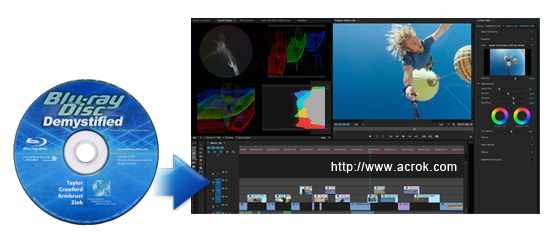
Adobe Premiere Pro is a timeline-based video editing app developed by Adobe Systems and published as part of the Adobe Creative Cloud licensing program. There are more and more people that love to use it to create images that are simply impossible with other tools. Premiere Pro CC itself supports MP4, MOV, MPG, MTS, MXF, WMV videos with some high quality codec mainly. So, if you want to create a post production, you’d better make sure the source video is supported by Premiere Pro CC. Here, today we would focus on how to make Blu-ray files editable in Premiere Pro CC.
If you want to edit Blu-ray with Premiere Pro CC on Windows 10, the only way is to convert Blu-ray to Premiere Pro CC supported video format. Fortunately, it is not hard to get. With some Blu-ray Ripper tools, you can easily remove Blu-ray copy protection and re-encode Blu-ray to H.264, MPEG-2 codec video for Premiere Pro CC. Below is the best software we picked out for you.
Best Blu-ray to Premiere Pro CC Converter
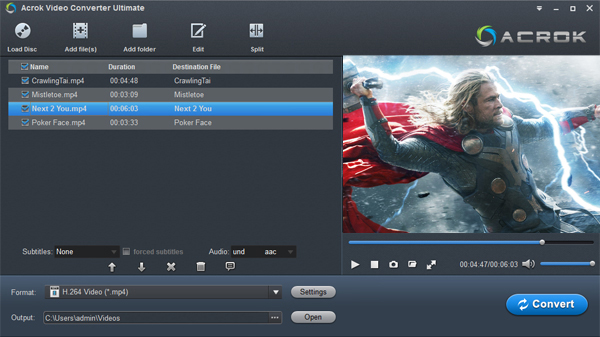
How to convert Blu-ray files on Windows 10? Acrok Video Converter Ultimate is a professional Blu-ray converting program which supports outputting various video formats H.264 MP4/MPEG-2 MPG/H.264 MOV for Premiere Pro CC, CS6, CS5, etc. It can remove Blu-ray copy protection then output Premiere Pro CC compatible MP4, MOV or MPG video files. It supports to output H.264 MP4, DNxHD MOV, MPEG-2 MPG, etc., for Premiere Pro CC smoothly editing.
Besides converting Blu-ray for Premeire Pro CC, it also can rip Blu-ray to Final Cut Pro X, DaVinci Resolve, Avid Media Composer, iMovie editable video. Furthermore, you can configure audio and video settings when it comes to the codec, frame rate, sample frequency rate, channel mode and others. Additionally, you can edit video clips with built-in video editor to trim, crop, merge, split, rotate, flip, volume, add subtitle/watermakr and more to output video ideal footage for Premiere Pro CC.
For Mac users, Acrok Video Converter Ultimate for Mac is suggested to rip Blu-ray to Premiere Pro CC on Mac. You can free download Windows and Mac Blu-ray Ripper here.
Steps to Extract Blu-ray Clips for Premiere Pro CC Editing
Step 1. Import Blu-ray files
Install and run Acrok software as the best Blu-ray Ripper. Insert Blu-ray disc to your ROM, click “Load Disc” to import Blu-ray disc directly from ROM. If you have Blu-ray ISO or Blu-ray folder, choose the corresponding option to load Blu-ray movies from your computer. The main title in your Blu-ray will be checked by default; so let’s move on and choose format.

Step 2. Choose H.264 MP4
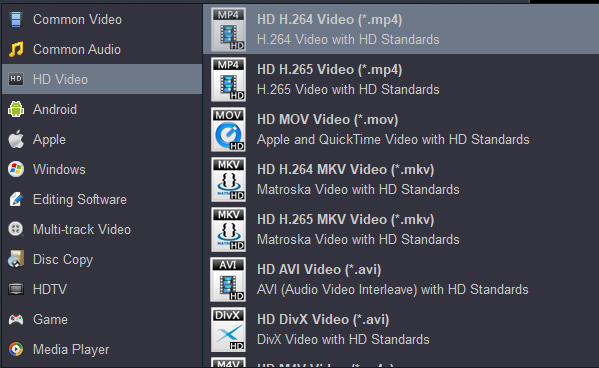
Click the “Format” drop-down list and choose “HD Video >HD H.264 Video (*.mp4)” as below for Premiere Pro CC. Acrok Blu-ray converter also supports other common foramts and hot digital devices supported format output. You can rip and convert Blu-ray to amy format and any device.

Tips:
1. On the top tool bar on the main interface, click the pencial like “Edit” icon to open video editor window, you can trim Blu-ray movies to remove the unwanted parts by setting the start and end time, crop to remove the black borders or unwanted area by dragging the dash line around the video frame, flip video, add text/image/video watermark, change video picture effect, replace/remove audio in video, add external subtitles, etc.
2. Click the “Settings” button to adjust video size, bitrate and frame rate if you are not satisfied with default settings.
Step 3. Start Blu-ray to MP4 Conversion
Click the big red “Convert” to start converting Blu-rays to H.264 codec. Ok, done! Hit “Open” to find the converted video files. Finally, simply drag and drop Blu-ray rips to get your media files on pool directly. Then you can edit the Blu-ray rips in Premiere Pro CC.


